
The admin’s login page (yoursite.com/wp-login) contains a pre-built WordPress form that helps you access your site’s admin area. Unfortunately, it has a very simple user interface with a gray background and a default logo. That’s why many website managers want to customize it and make it better.
How to Customize Login Page in WordPress
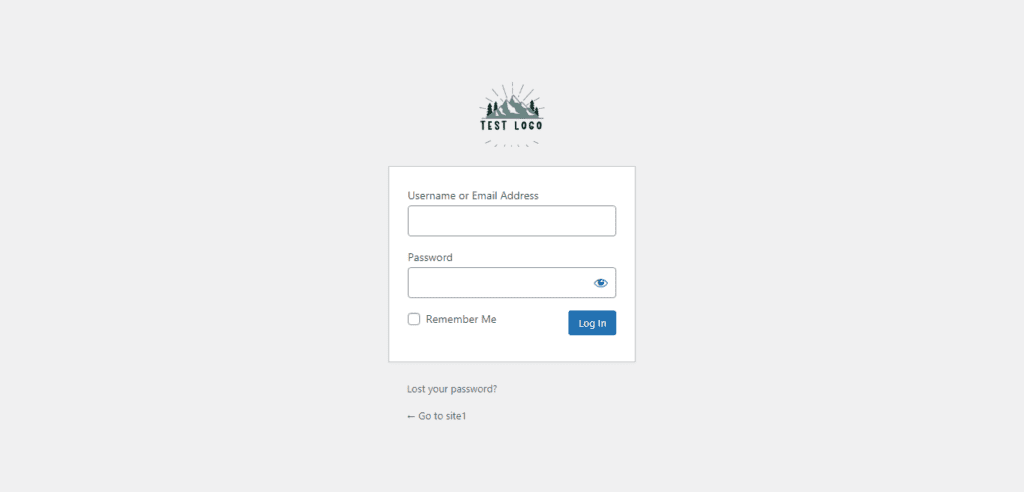
In this post, I will show you how to customize your WordPress login page, and once you finish reading, you’ll be able to create a beautiful login page like the screenshot below.
Note: Make sure to back up your website before editing files since an error could bring your whole site down.
Step 1 – Prepare files and folders
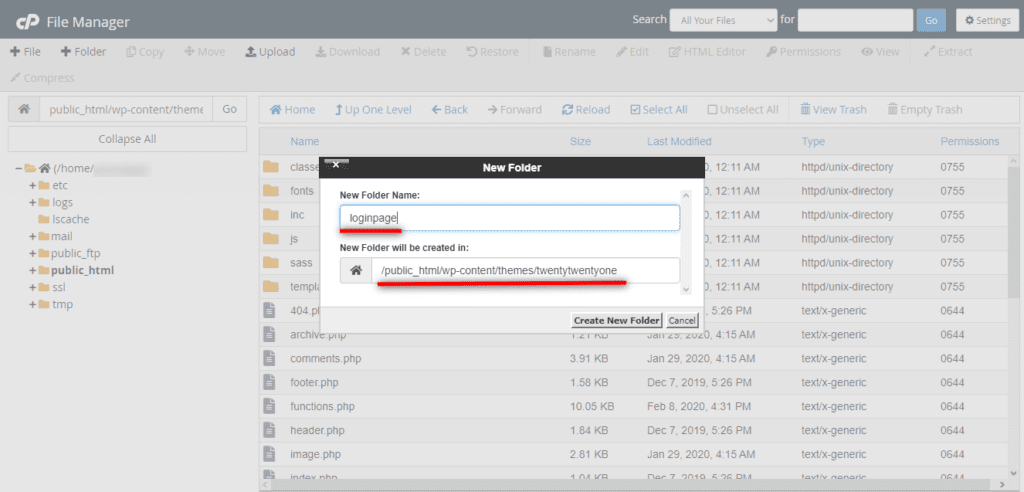
To customize your wp-login page, firstly, you need to create some files and folders. So, in the file manager, go to wp-content > themes > your-theme-name, create a new folder, and name it “login page.”
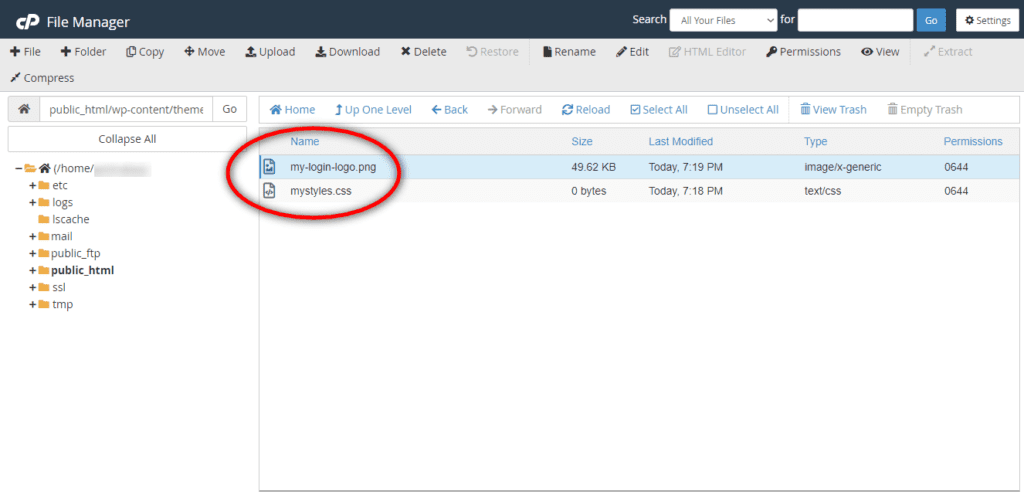
Now, create a new CSS file (mystyles.css) in this folder. Then, choose a logo for your wp-login page and name it “my-login-logo.png.” Finally, copy the logo in the “login page” folder, just like the screenshot below.
Step 2 – Connect the CSS file to the wp-login page
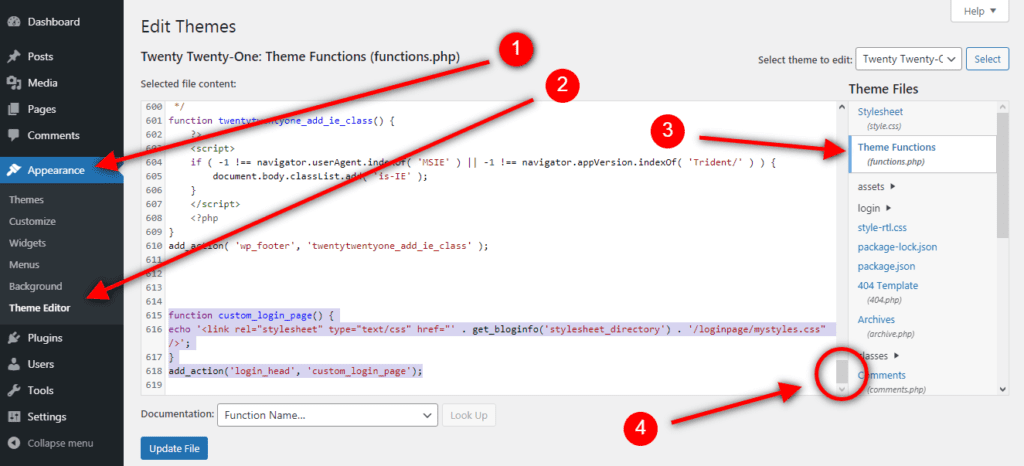
To connect your CSS file to the wp-login page, you should add some codes to the functions.php file. Then, as the next step, go to your theme directory, open the function.php, and add the codes below.
You can also access function.php in Appearance > Theme Editor. Add these codes under the last line of code within the file:
function custom_login_page() {
echo '<link rel="stylesheet" type="text/css" href="' . get_bloginfo('stylesheet_directory') . '/loginpage/mystyles.css" />';
}
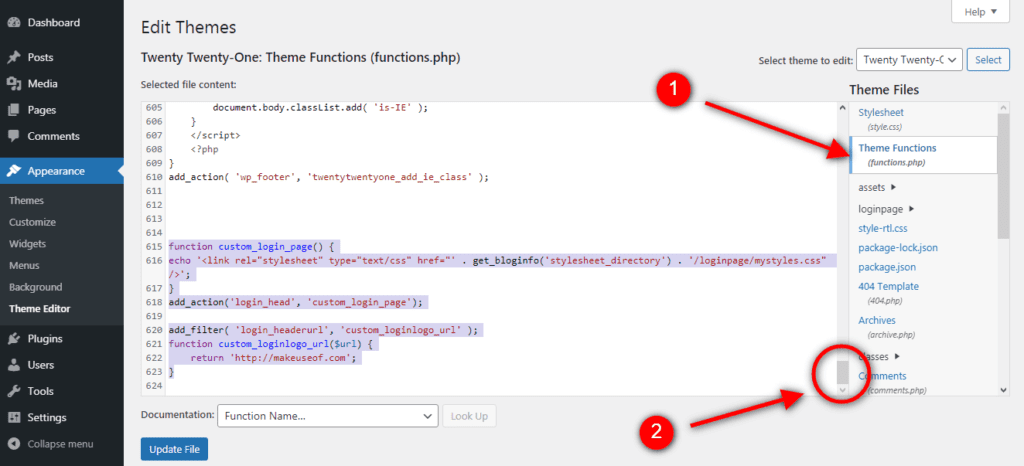
add_action('login_head', 'custom_login_page');Your functions.php file should look like this so far:
Step 3 – Change the logo for the admin login page
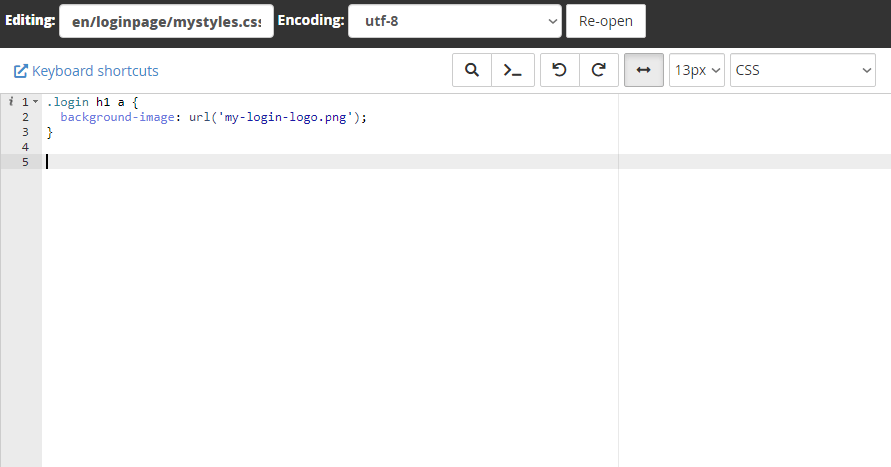
Next, to change the logo, open the mystyles.css file and add this code.
.login h1 a { background-image: url('my-login-logo.png'); }This code will display the “my-login-logo.png” image on your wp-login page.
Save the changes for the mystyles.css file and reload your wp-login page.
Congratulations! You have successfully changed the logo. Now, let’s head over to the CSS file again and change the background color for your wp-login page.
Step 4 – Change the background color for the admin login page
To change the background color, add this code to the mystyles.css file.
body {
background-color: #f38181
}
Feel free to change the Hexadecimal code (the color) as you like. Save changes and take a look at your admin login page again.
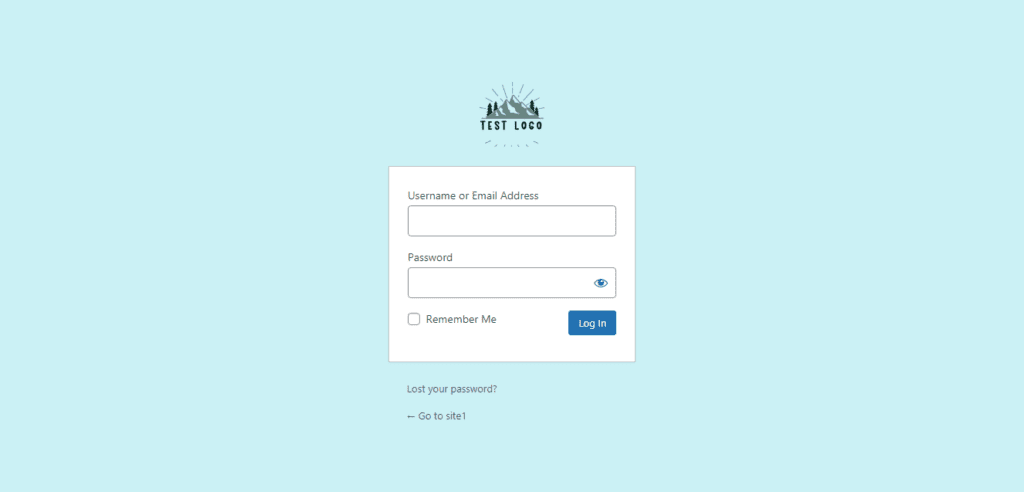
OK!
You can also change the link for the logo image. To do that, open the function.php file and add this code:
add_filter( 'login_headerurl', 'custom_loginlogo_url' );
function custom_loginlogo_url($url) {
return 'http://makeuseof.com';
}
Don’t forget to change the URL to what you want. After adding all codes, your function.php file should look like the screenshot below:
How to easily customize the admin login page using a WordPress plugin
If you are unfamiliar with code editing in WordPress, then it is a good idea to install an easy-to-use WordPress plugin on your site and customize the admin login page with ease.
There are many free WordPress plugins on the internet for customizing the admin login page, such as Custom Login Page Customizer and Custom Login Page Customizer by Colorlib. So feel free to choose and install one of the mentioned plugins.
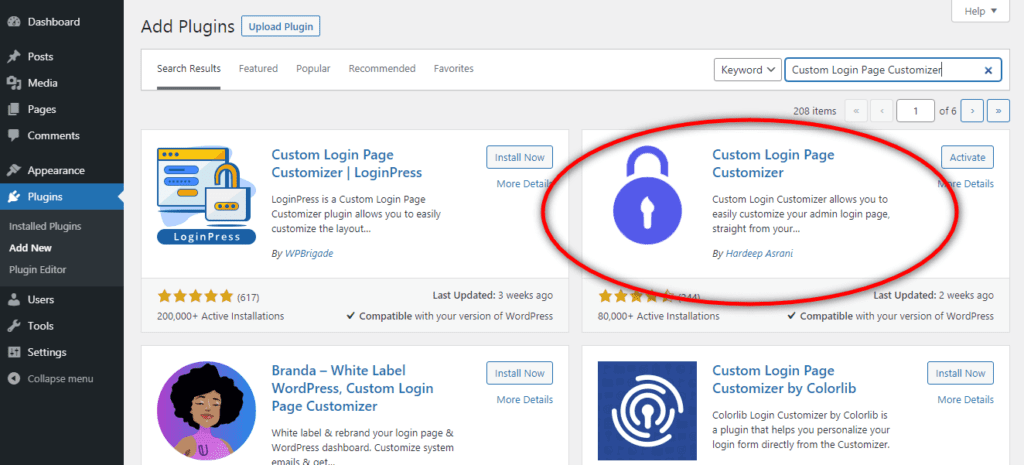
In your WordPress admin area, click Plugins > Add New, search for “Custom Login Page Customizer,” and install the plugin.
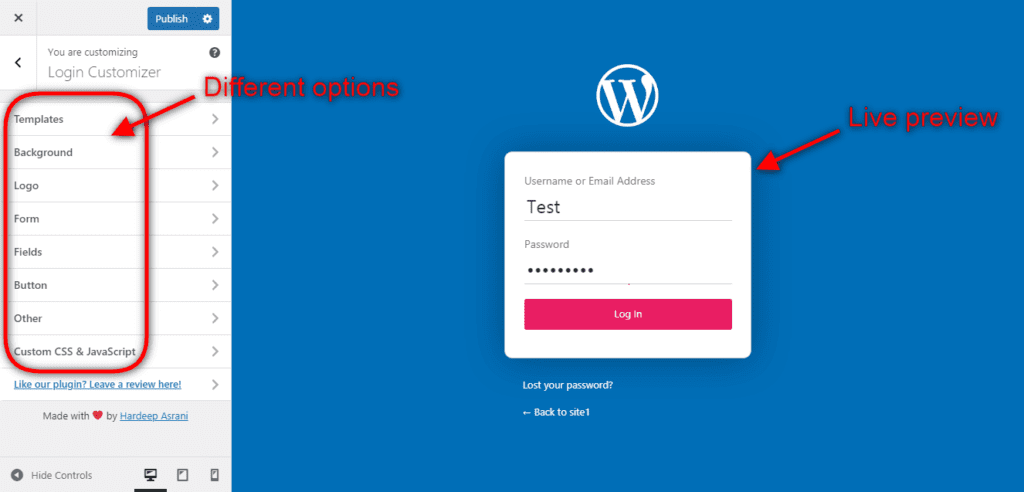
After installation and activation, click Login Customizer > Customizer. It will take you to an easy-to-use live editor where you can edit your admin login page visually (without writing or editing codes).
Installing a WordPress plugin is more accessible for those who don’t want to write and edit PHP or CSS codes.
Conclusion
Some WordPress websites use the wp-login page as their main login page for different user roles such as Editor, Author, Contributor, etc. So they had to make it beautiful, colorful, and unique. In this brief article, I tried to teach you how to change and customize it. Thanks for reading so far, and I hope you find this article helpful!


Thank you. Useful information!